Essential tidal timings, the 2.5-hour causeway rule, terrain challenges, and emergency cut-off protocols.
You're responsible for your own safety — don't rely on this app alone. Always check the causeway times posted at the Lookout Station or National Trust shop window before you cross, build in a generous safety margin in case the causeway closes early due to weather conditions, and ask a Coastwatch volunteer if you're unsure.
Why times can vary
Times shown here are estimates and can vary slightly from the Lookout Station's own data. In poor weather or heavy sea conditions — strong onshore wind, storm surge, heavy swell, or a big spring tide — the causeway can close earlier than shown, and it has been known to close a full hour early. The reverse can happen too: settled weather or a strong offshore wind can occasionally uncover it a little earlier than calculated — but never set off on that assumption, always check by eye that it's clear first.
Causeway Tracker
CLOSED · SUBMERGED
IF STILL ON THE WORM — STAY WHERE YOU ARE!
Causeway closing soon. Do not attempt to cross.
NEXT OPENING IN--h --mNext safe crossing window
Next opening:--:-- BST·Current time: --:-- BST
Return walk: allow 1.5 hours from Outer HeadStatus calculated for ––
Tidal WindowCurrent time: --:-- BST
NOW
Safe to Cross From--:--
Low Water--:--
Causeway Closes (est.)--:--
todaySunrise --:--Sunset --:--Dark by --:--
On the day: check the board and the red flag
Crossing times board: the board on the clifftop beside the Lookout shows today’s safe crossing times. Check it before you set off — when it says TOO LATE TO CROSS, please don’t go.
Red flag: a red flag is raised at the Lookout when there’s 1 hour to go before the causeway closes — when it’s flying, it’s too late to cross to the Worm. Don’t rely on the flag: in strong winds it may not be flying, so always check the times.
Already on the Worm? Only head back to the mainland if you have enough time and it’s safe to do so. If not, contact someone straight away: call the Lookout on 07392 327216 for advice, or call 999 and ask for the Coastguard. They’ll talk it through with you and help decide what’s safest — the next opening is often after dark. No phone signal? Ring the bell on Inner Head and stay near it — if the Lookout is open, our volunteers will see you. If the Lookout is closed, try 999 and ask for the Coastguard — emergency calls can sometimes connect even when your phone shows no signal.
Times up to 31 December 2026 are taken directly from the NCI Worm’s Head causeway tables. Any dates after that are estimated from a standard tidal model, not official data — for those, cross-check with Admiralty EasyTide.
Cut Off or Stranded?
Every year, visitors misjudge the tide and get trapped on Worms Head. If the water begins covering the causeway:
STAY ON OR GO BACK TO THE GRASSED AREA — DO NOT ATTEMPT TO WADE OR SWIM
If you’re cut off on the island, stay where you are on high ground. Never try to swim the Sound — the tidal race reaches violent speeds of over 5–7 knots and is deadly, even for strong swimmers with life jackets. Rescue is provided by volunteers; call for help.
Rock pools and channels can flood out of sight before water reaches the path you’re on — and levels can rise by up to 2m in that first hour alone, fast enough in a narrow gully to knock you off your feet. Turn back well within the safe window — rescue is provided by volunteers and may take time to reach you if you’re cut off.
RING THE EMERGENCY BELL
There is a large cast iron emergency bell located on the Inner Head path facing the mainland (///deep.develops.indicated). Ring it vigorously to alert NCI Worms Head watchkeepers. If no one responds, call 999 and ask for Coastguard.
⚠ Outer Head Seasonal Closure
The Outer Head is closed to all visitors from 1st March to 31st August each year, to protect nesting guillemots, razorbills, and kittiwakes. If you're visiting during this window, plan your route to Inner Head or Middle Head only.
The 2.5-Hour Causeway Rule
The tidal causeway between the mainland cliffs and Worms Head Inner Head is strictly passable for only 2.5 hours either side of low water (a 5-hour operational window in total).
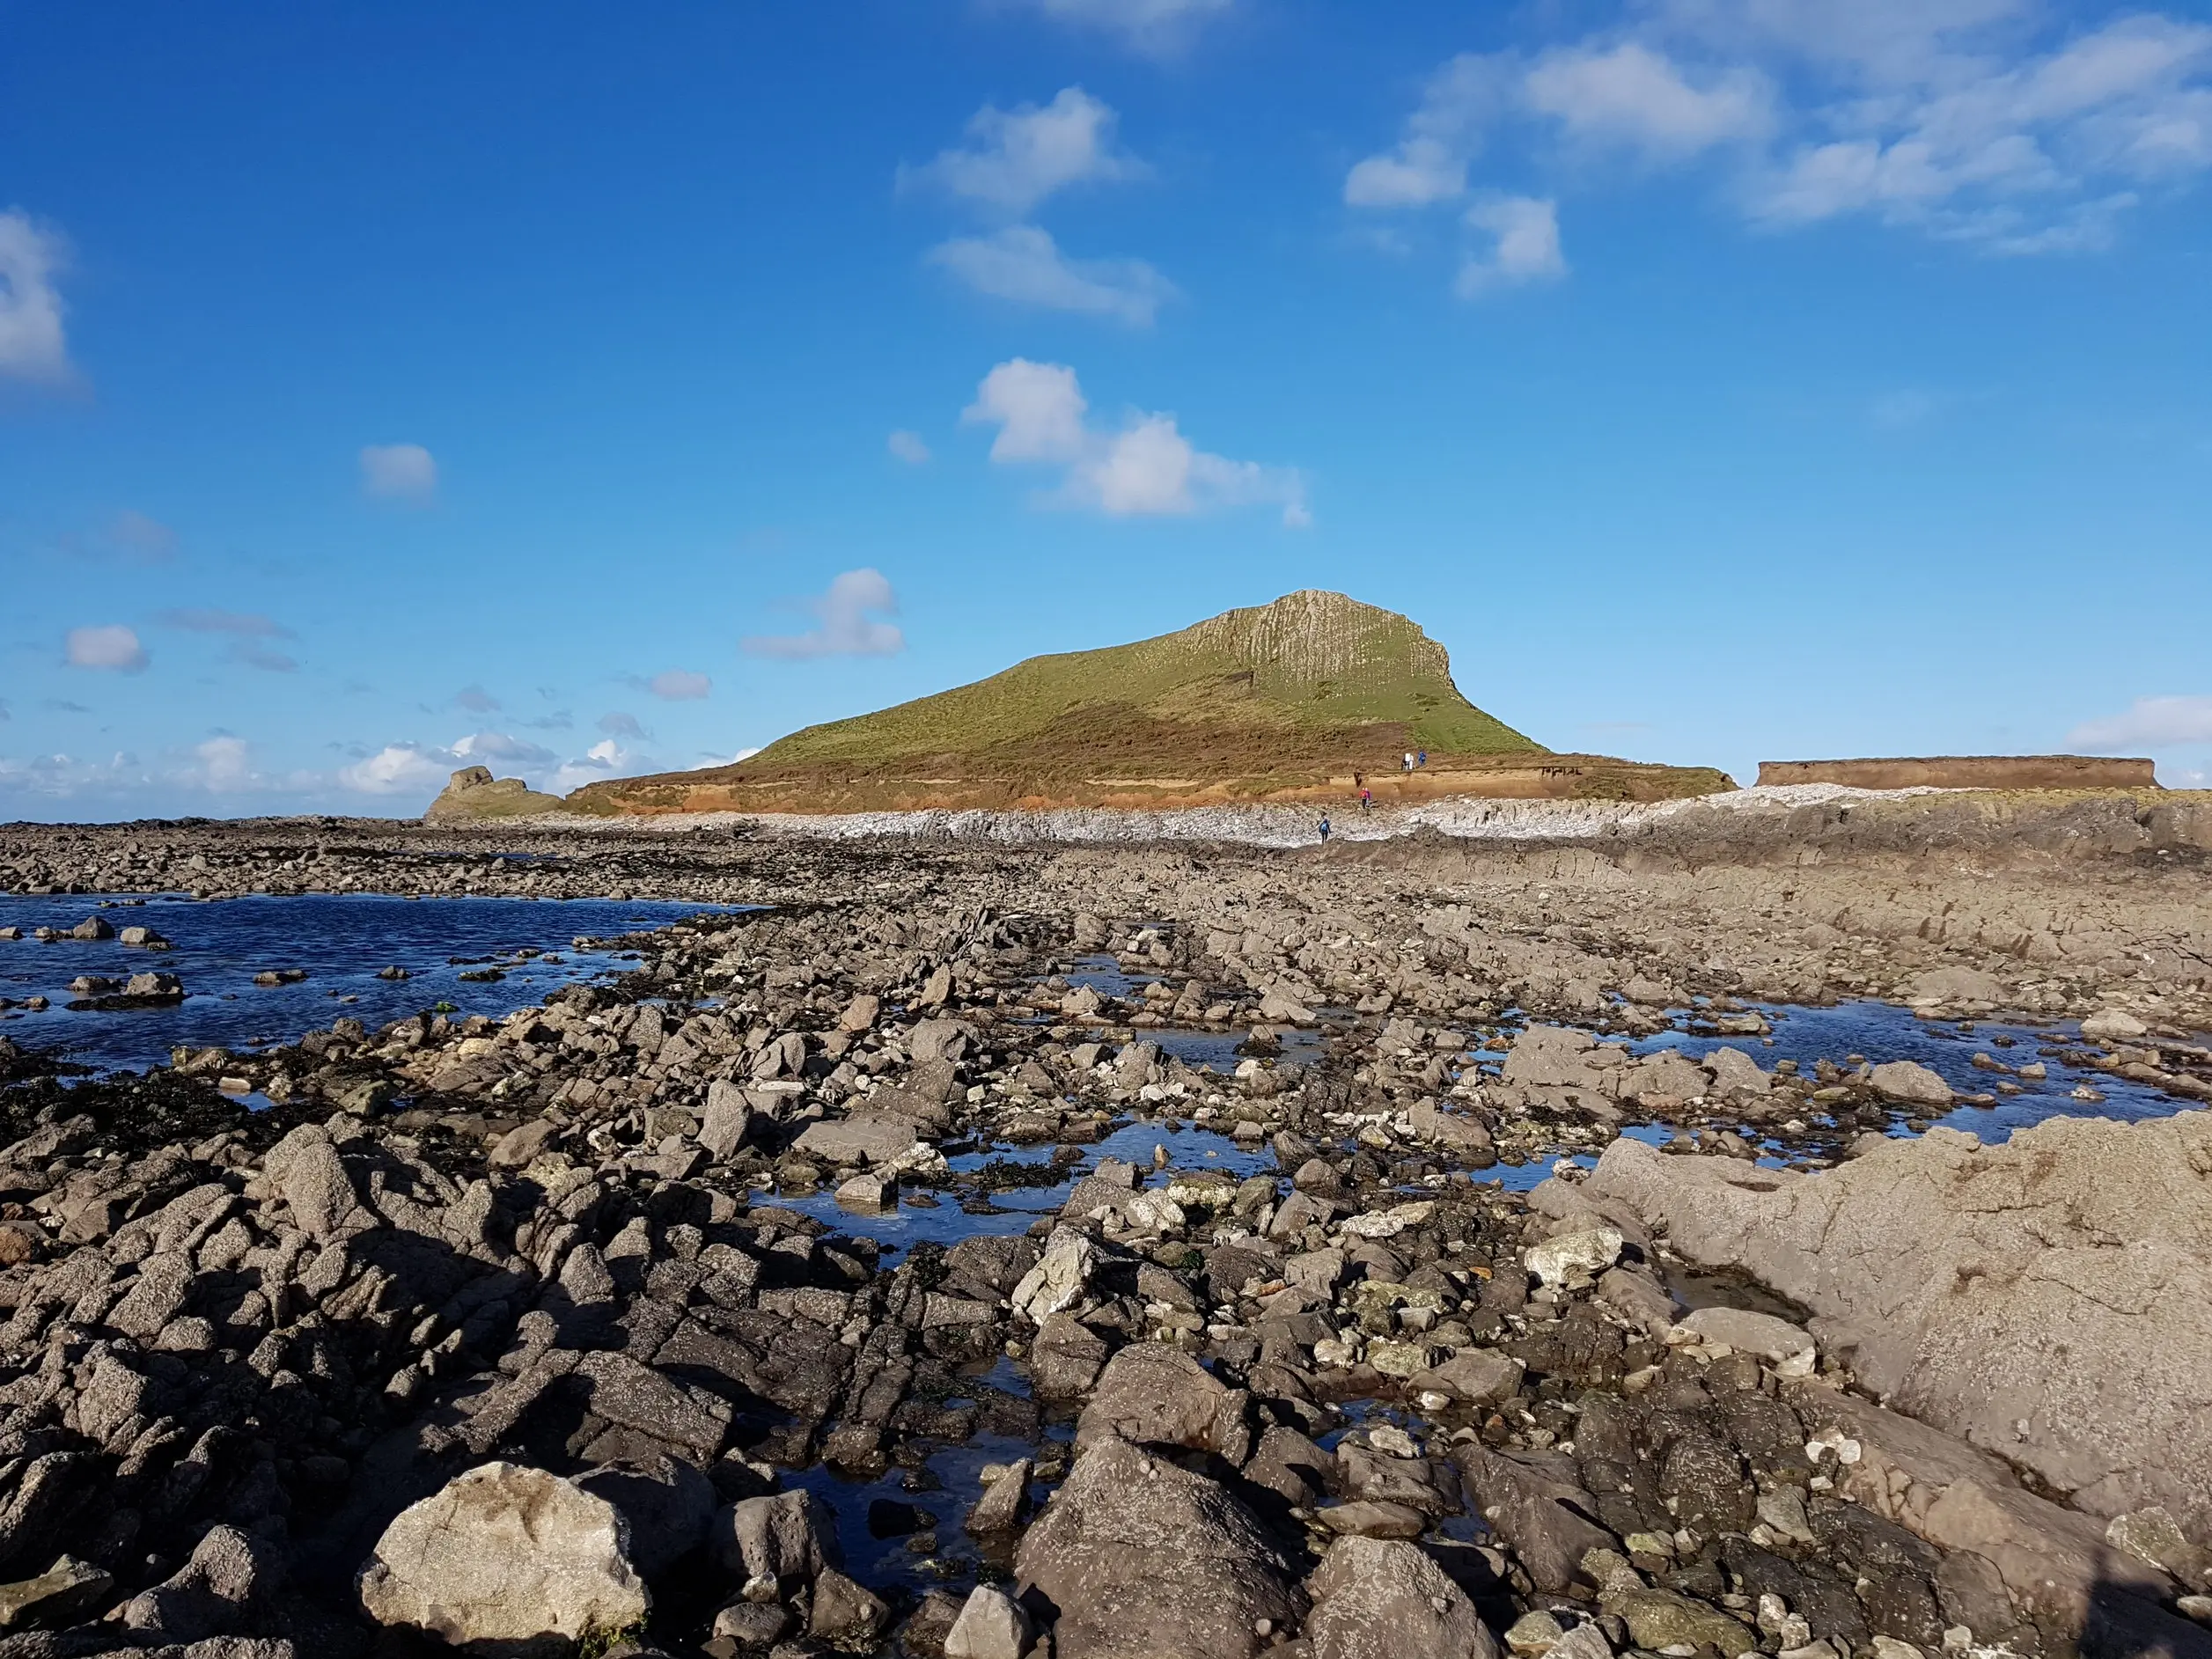
Photo courtesy of Zoe Evans
⚠
Strict Turnaround Rule:
If you plan to walk all the way to the Outer Head and back, you must set off the moment the causeway opens. You need at least 3 hours (about 1.5 hours each way) of steady, non-stop scrambling over sharp, uneven rocks to complete the round trip. Treat the calculated opening and closing times as the maximum available, not a guarantee — in poor weather the causeway has been known to close a full hour early, so allow a generous margin and turn back in good time — there's no downside to being back early, with fine coast-path views over Rhosili Bay, Fall Bay and Mewslade Bay, and rock pools near the causeway well worth exploring.
Never attempt to cross if:
The water has begun rising over the lower causeway rocks.
Less than 2 hours remain before the causeway officially closes.
You are wearing flip-flops, smooth-soled shoes, or unsupportive footwear.
The Route to the Outer Head
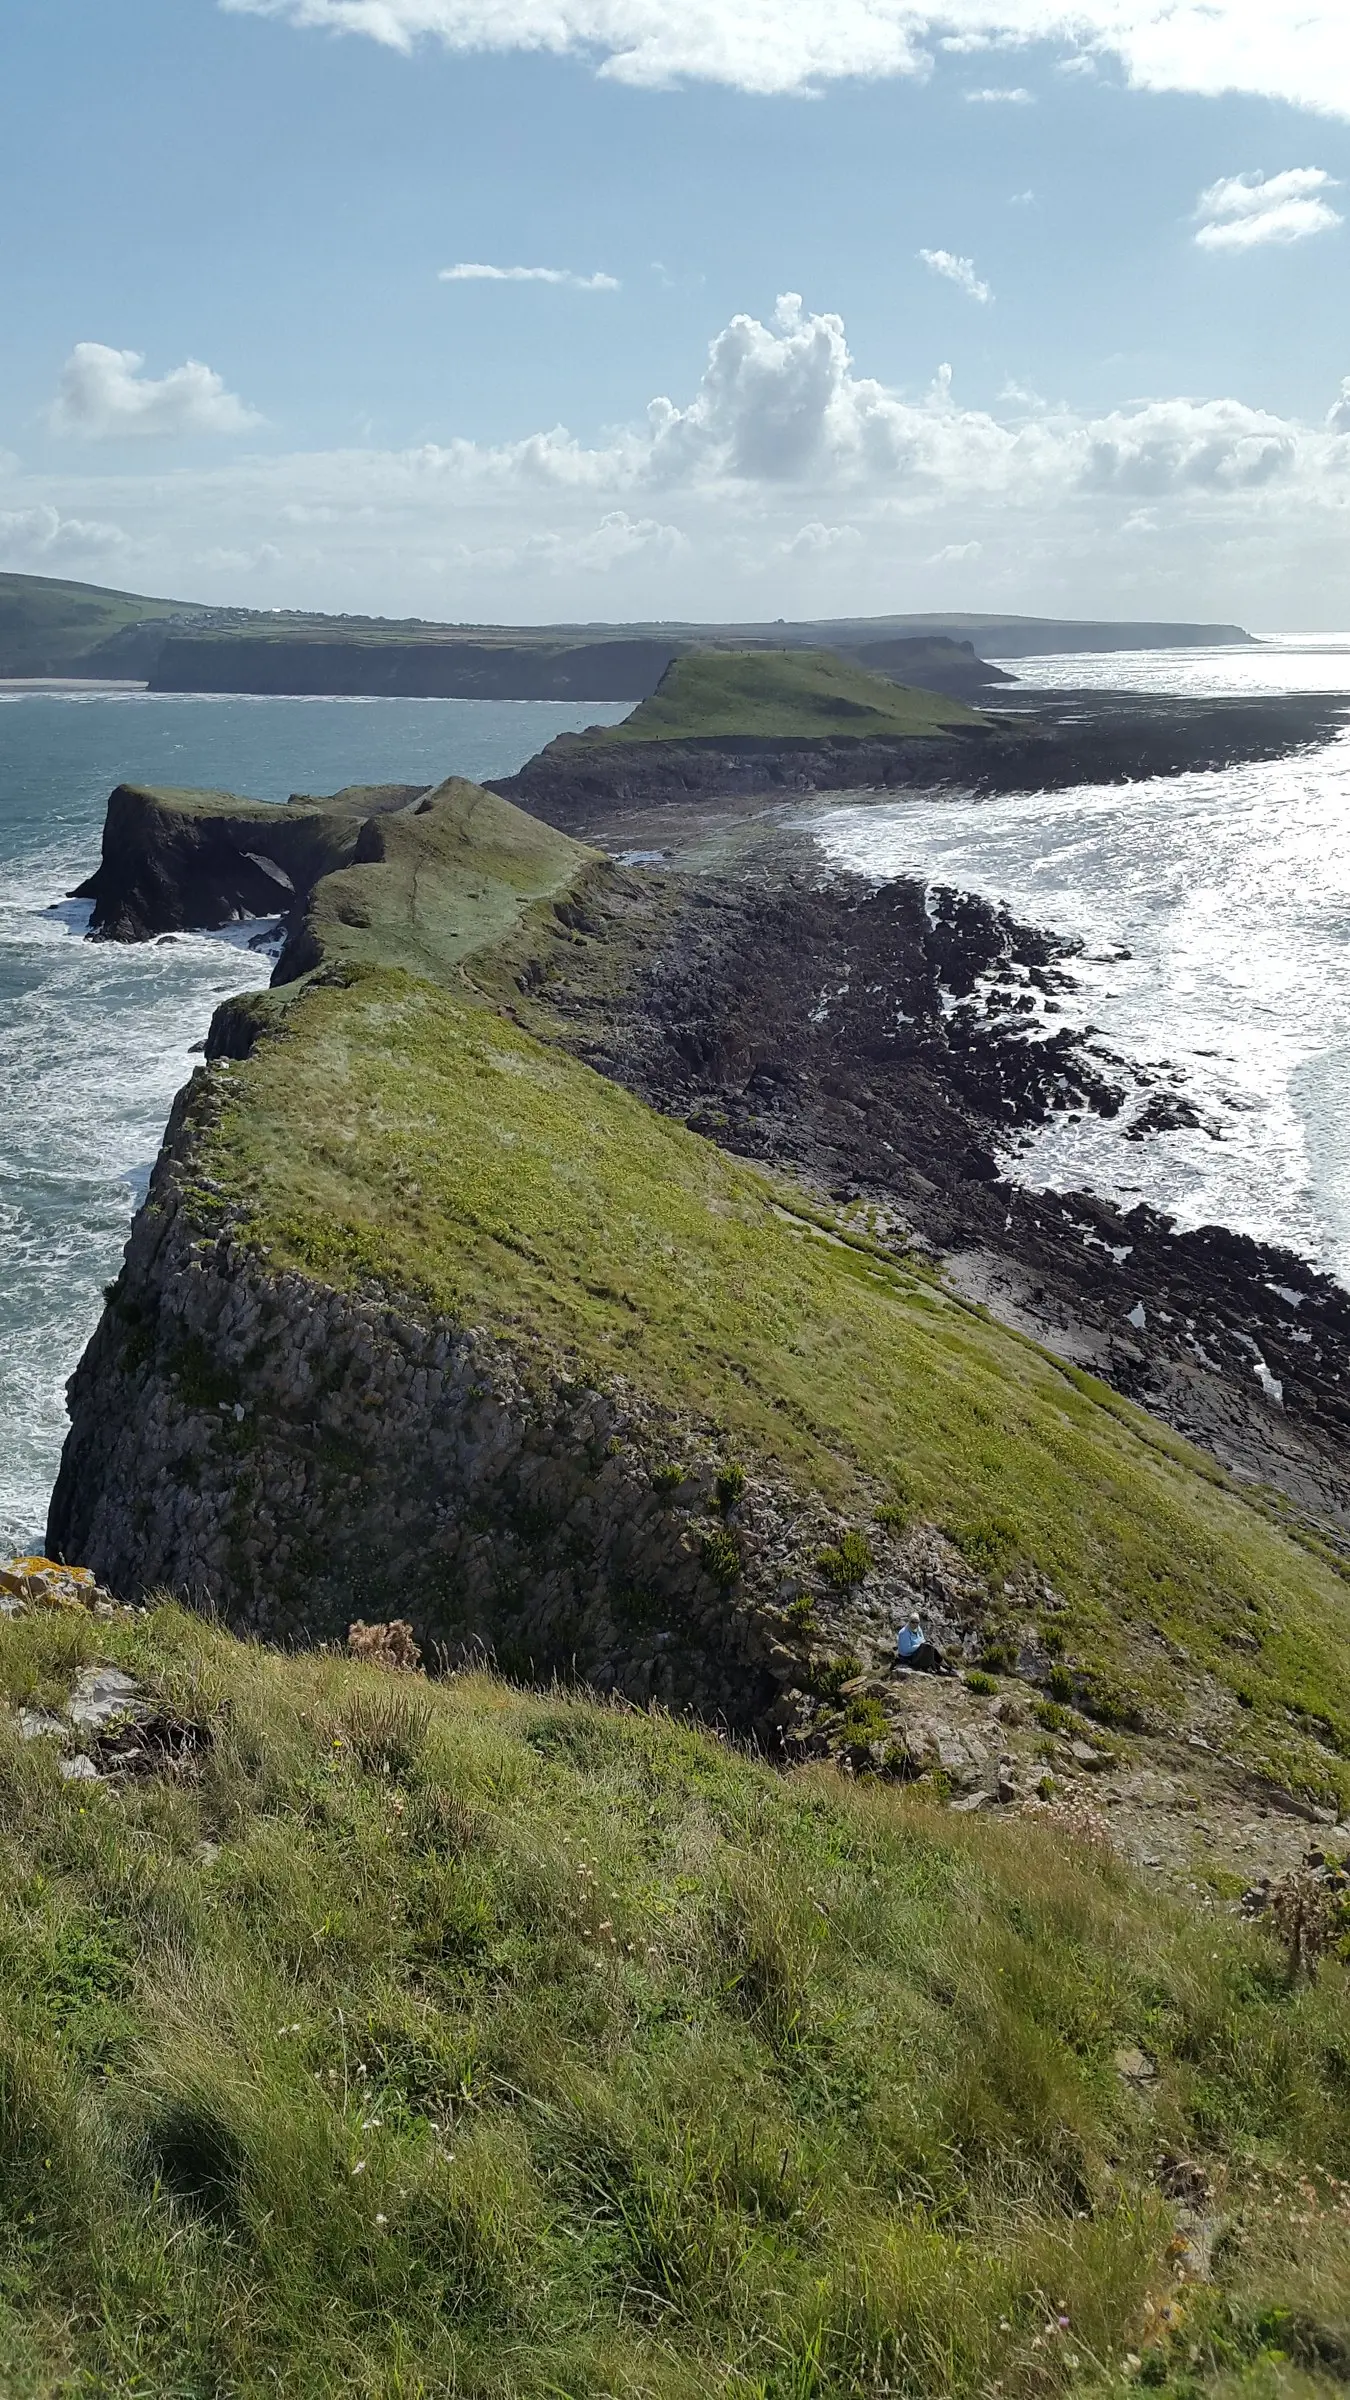
Walking the Worm is a strenuous, physical coastal scramble across fractured limestone ridges, jagged barnacle-covered rocks, and slippery seaweed. It is not an ordinary path.
⚠ Footwear Matters:
Sturdy footwear with good grip is essential. The causeway and the Worm itself are jagged limestone reef covered in barnacles and slippery seaweed — flip-flops or smooth-soled trainers are hazardous underfoot and a common cause of cuts and twisted ankles.
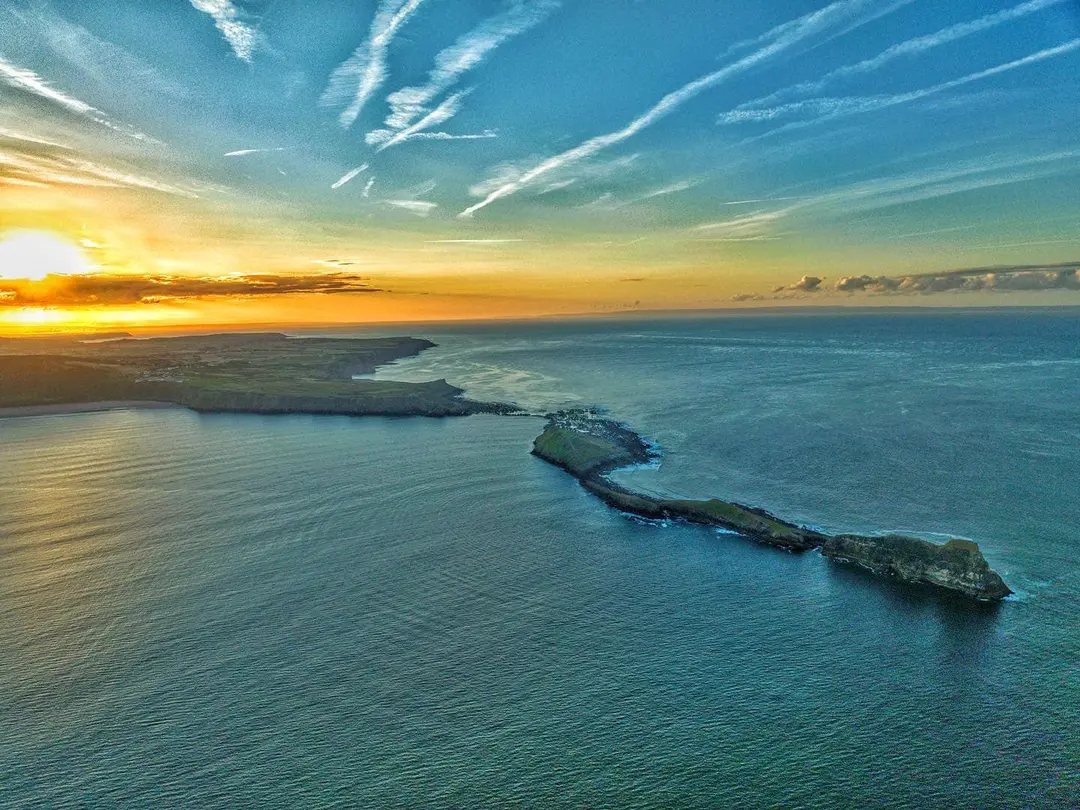
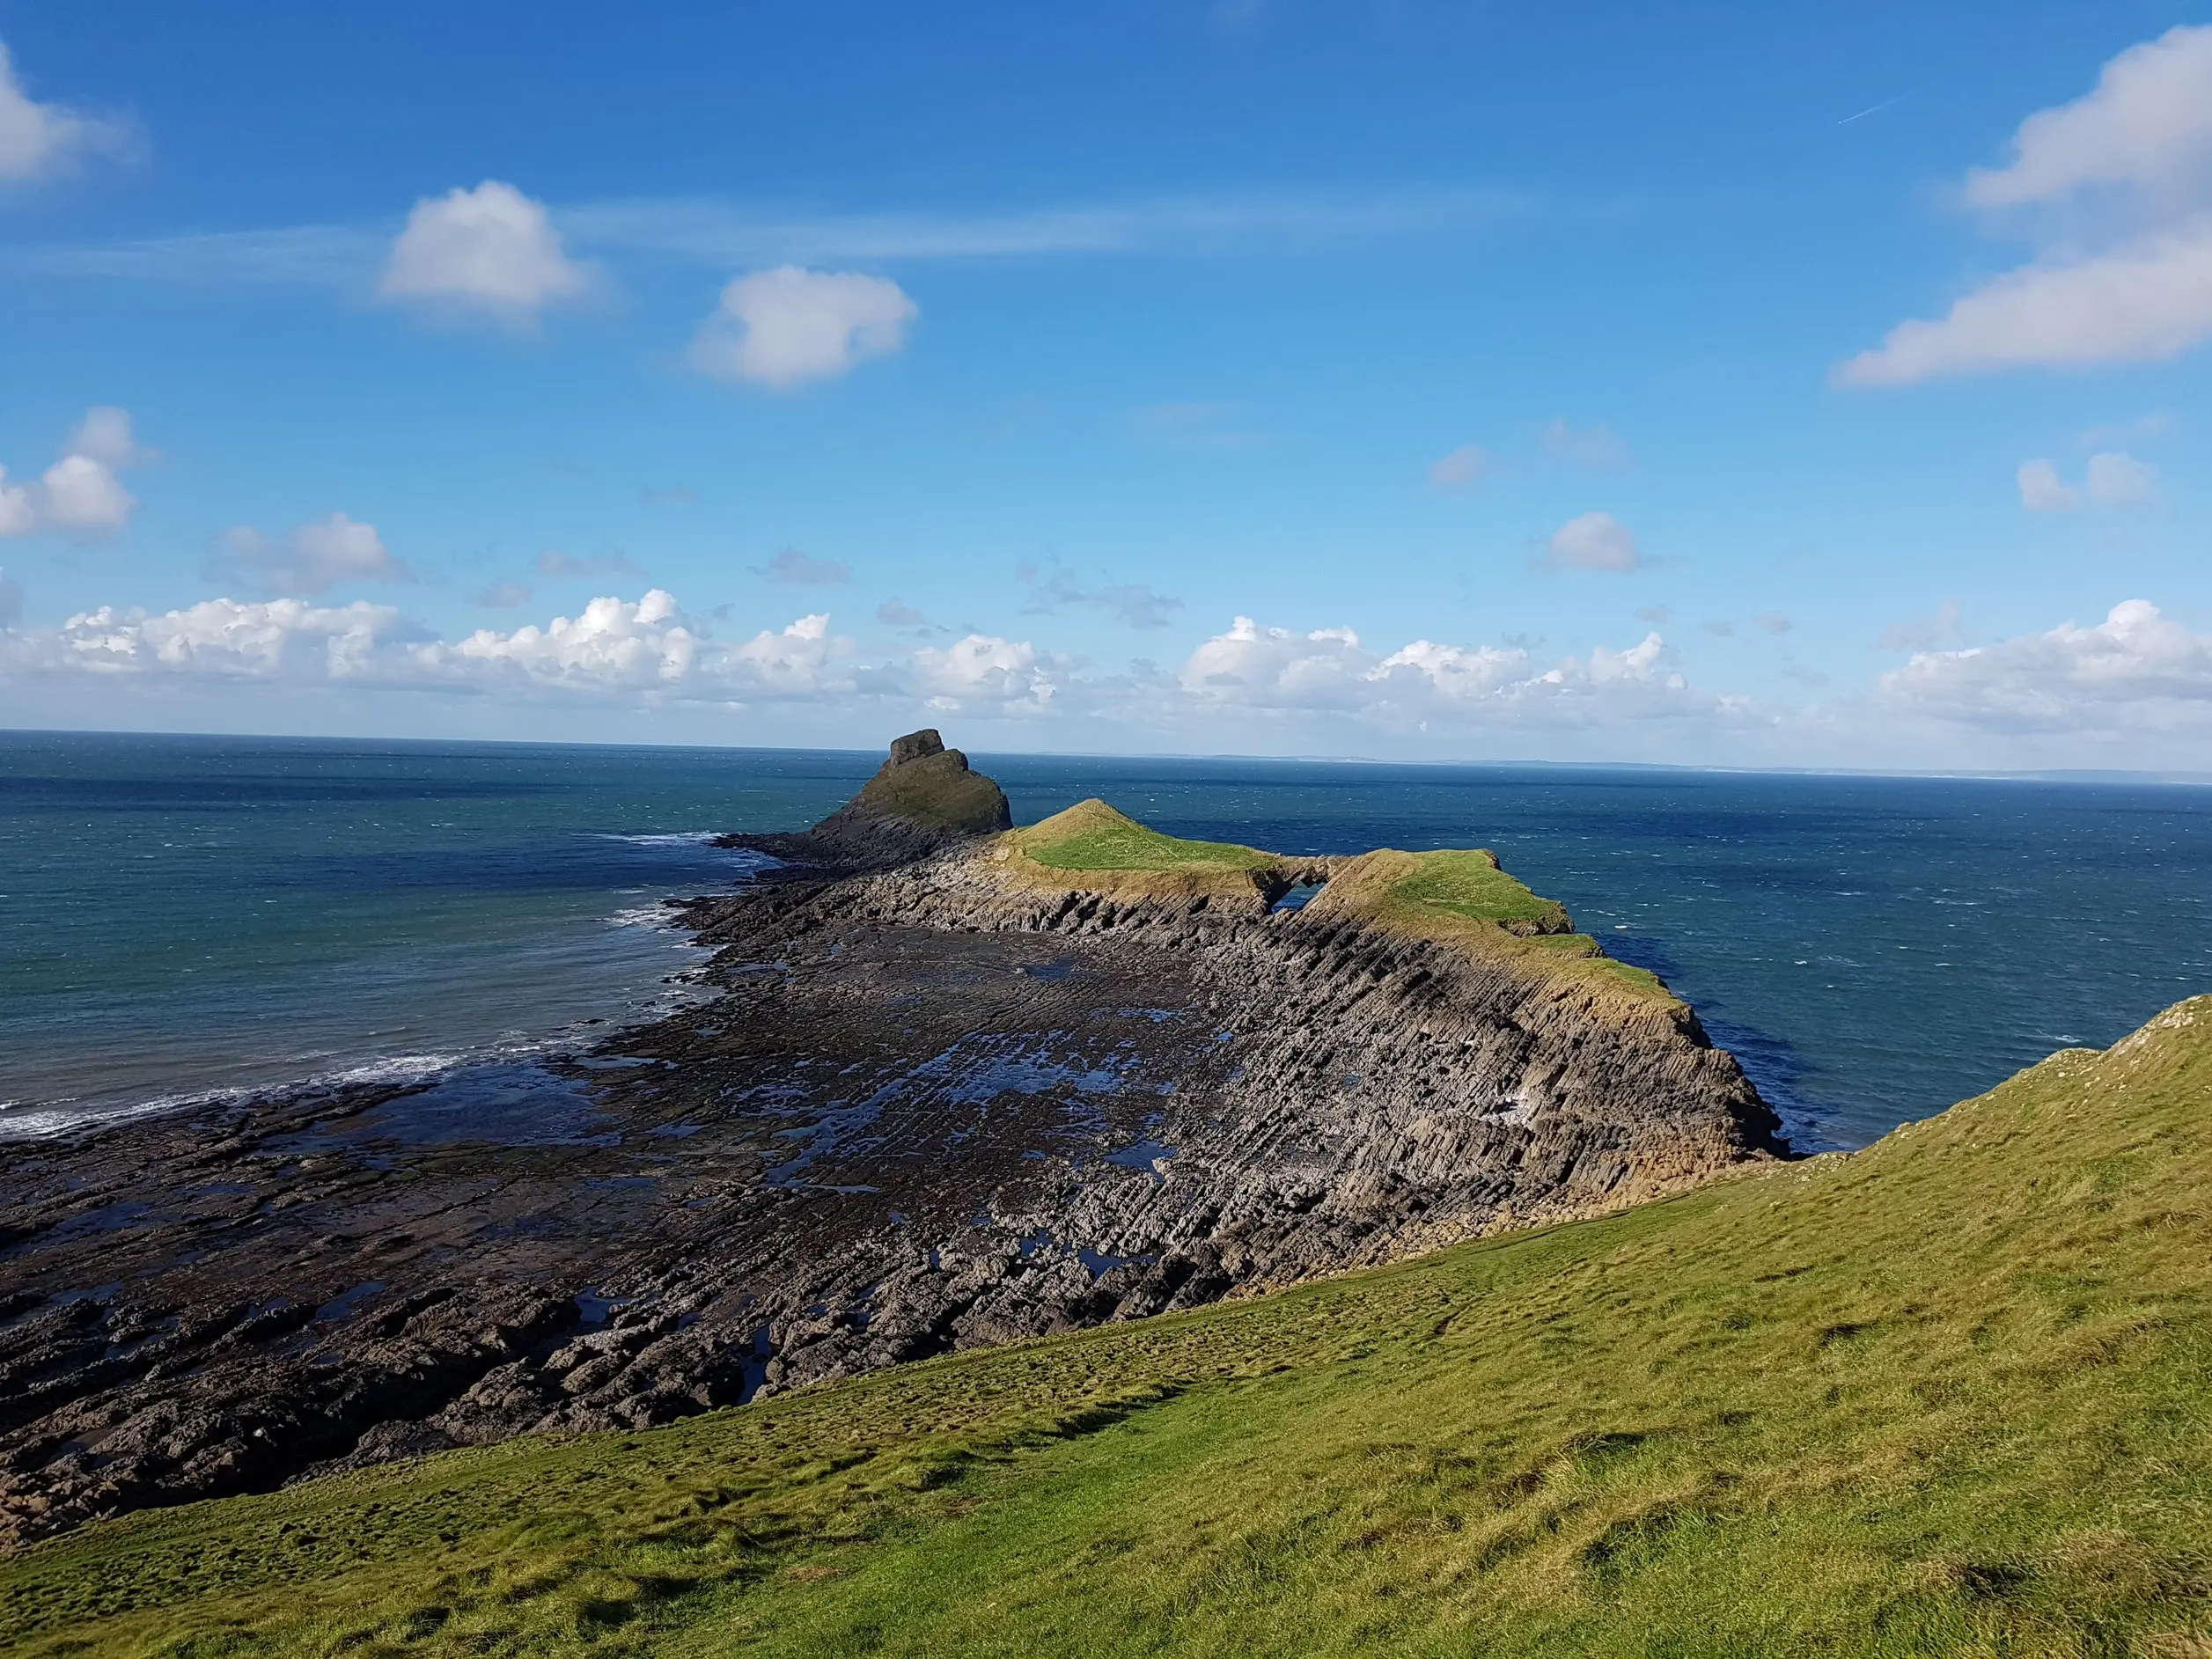
Worms Head from the air at sunset, from the causeway and Inner Head out to the Outer Head. When the tide turns, the causeway disappears under the sea. Photo courtesy of Smithy Gregg.
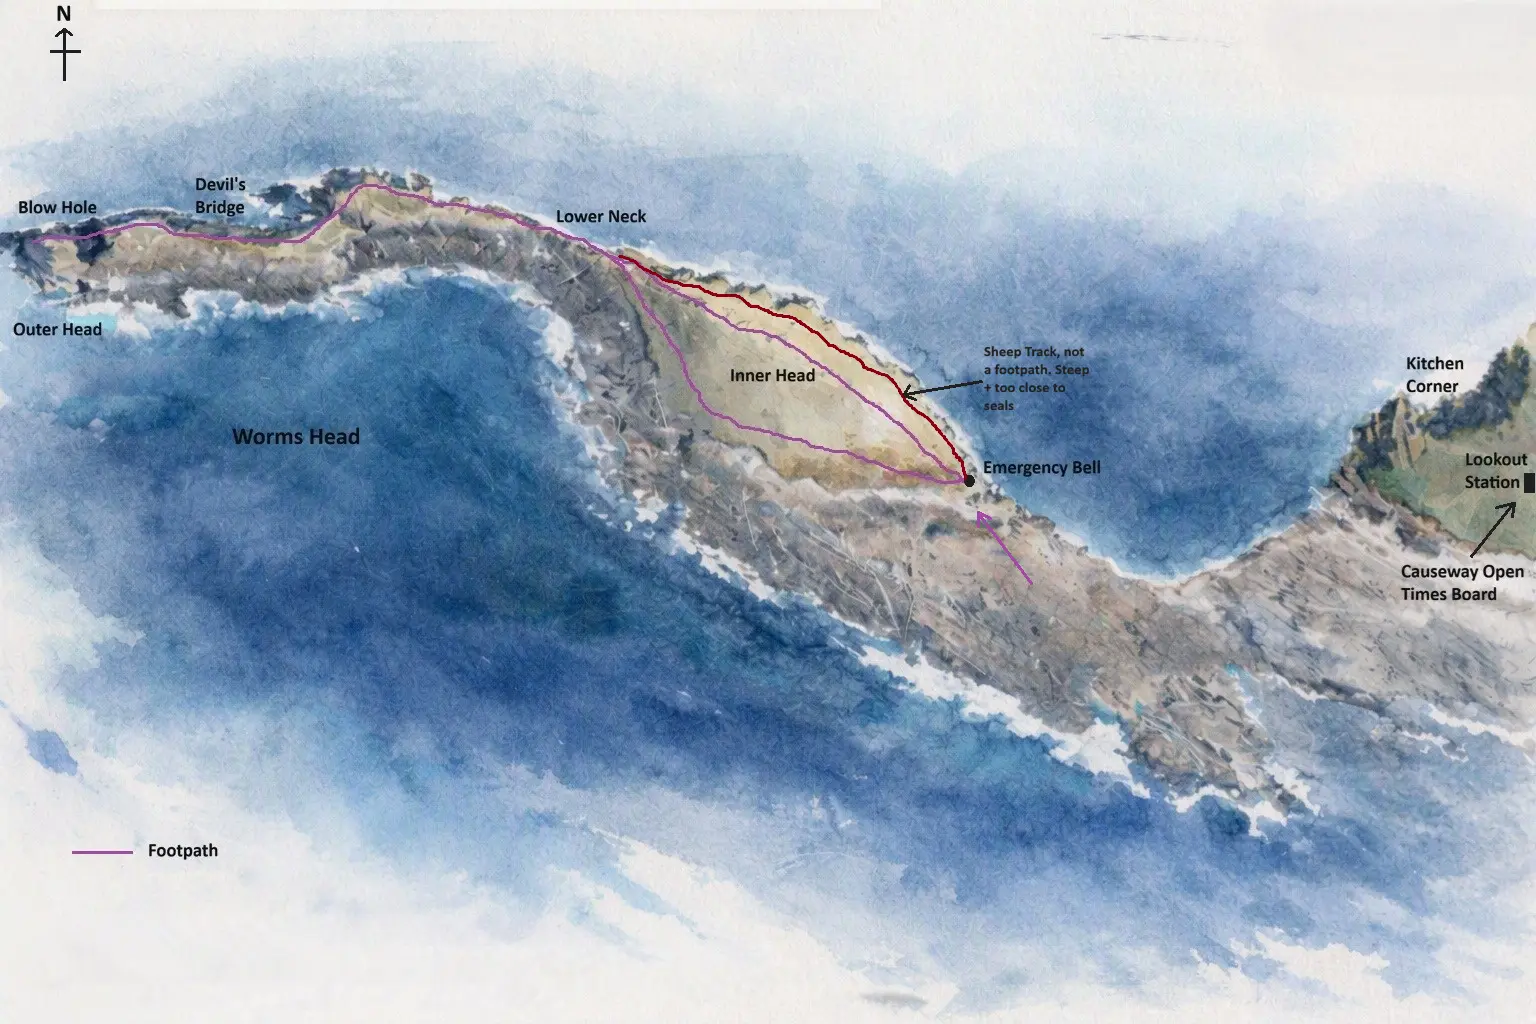
This map is a hand-illustrated guide to the general line of the route, not a surveyed or to-scale map — the actual path on the ground may vary. Always follow the marked route and waymarks in person, and use this alongside — not instead of — the tidal timings and safety guidance on this page.
⚠ Watch for the unofficial sheep path:
On the mainland side of Worms Head you may see a third, narrower path — this is a sheep path, not the main route. It is steeper and less stable underfoot. Please stick to the main marked route. Local farmers continue a generations-old Gower tradition of grazing sheep out on the Worm through the winter, moving them out in late autumn and bringing them back to the mainland in spring — if you encounter them, keep dogs on a lead and give them space (dogs must be kept on a lead on Worms Head at all times because of the seals regardless).
Sheep waiting to cross over to their new home on the Worm. Photo: Rhossili Sunflowers — see the story on Facebook →
Car Park to Lookout Station–1.3 km (about 20 min)
Lookout Station to the Tip of the Worm–2.3 km
1
The Causeway Scramble
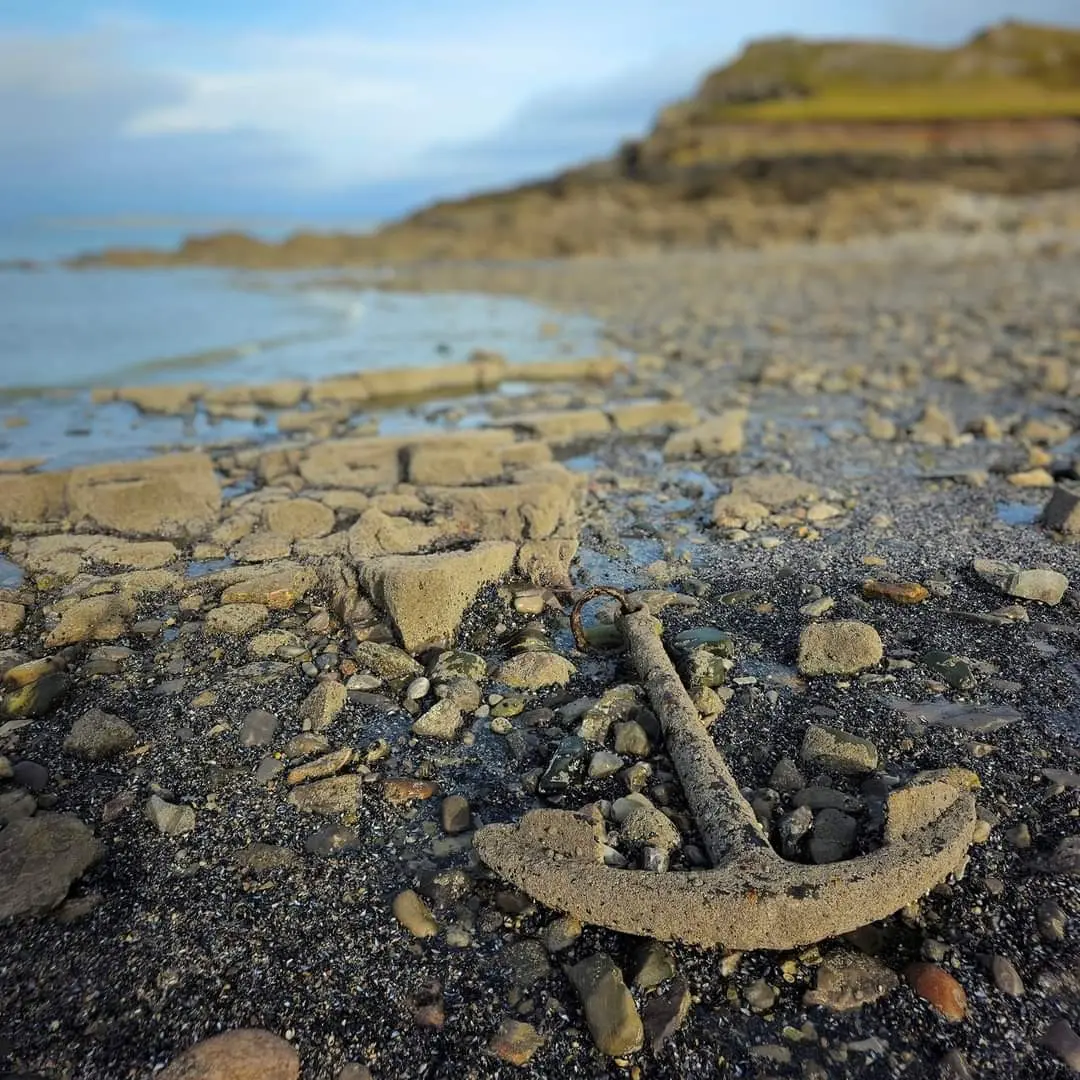
Around 400 metres of jagged, slippery rock reef, freshly exposed by the retreating tide. There's no path as such here — you're picking your way across bare limestone and rockpools, often slick with wet seaweed, so watch your footing constantly rather than the view. Keep an eye on the rocks around you too: grey seals often haul out along this stretch, and it's also where the old anchor from the wrecked collier Samuel lies wedged among the rocks (see below).
No bicycles or prams — the causeway is unrideable, unpushable reef and rock steps
2
The Landing Point
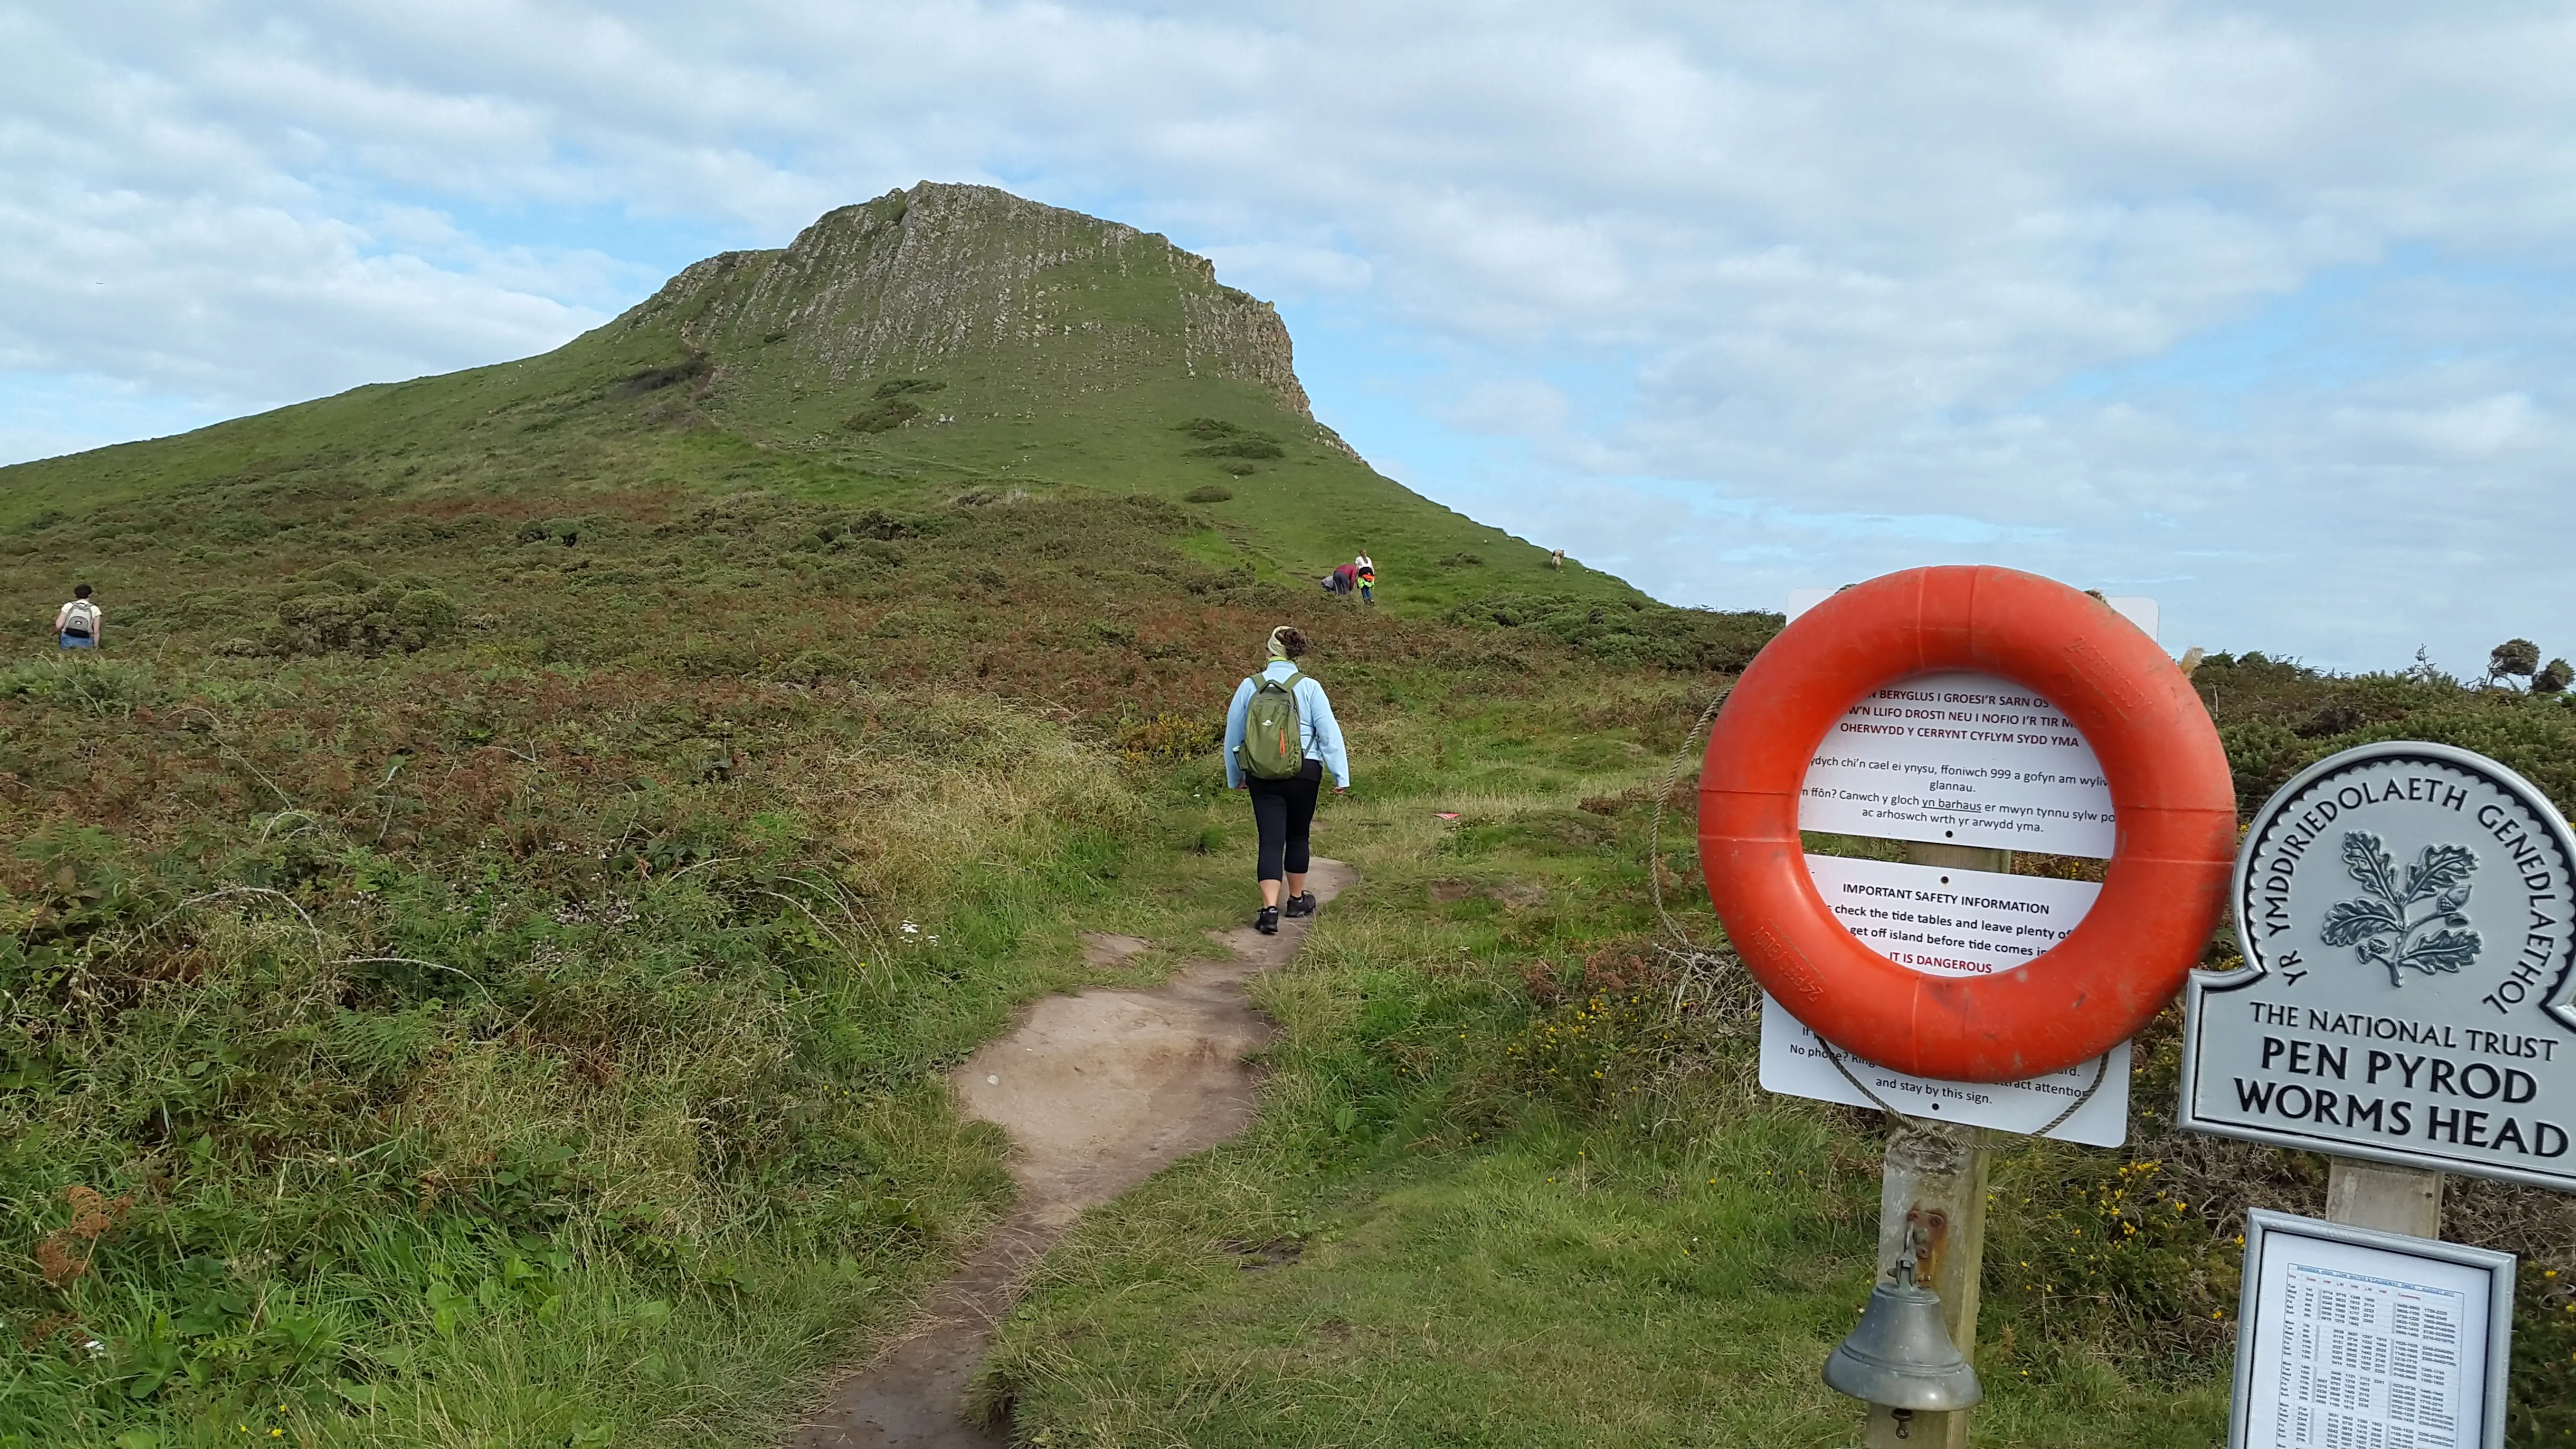
This is where you come ashore off the causeway and set foot on Worms Head proper — and it's worth a moment here before you carry on. The causeway crossing-times sign, a life ring, and an emergency bell all sit right at this spot, easy to spot and worth remembering: if you're ever cut off further out with no phone signal, this is the bell to head back to and ring repeatedly to alert our watchkeepers.
3
Inner Head to Low Neck
From the landing point, a grassy ridge trail climbs Inner Head before descending steeply to Low Neck, a narrow, low-lying rocky gap exposed to ocean swells on both sides. Two paths cross Inner Head: a lower path around to the left, and a higher path over the top with fine views back along the Worm and often seals on the rocks below to the right.
Low Neck is the toughest section on the Worm to cross — narrow, uneven rock where it's easy to twist an ankle, or worse. Go slowly and place each footstep deliberately.
4
Middle Head & Devil’s Bridge
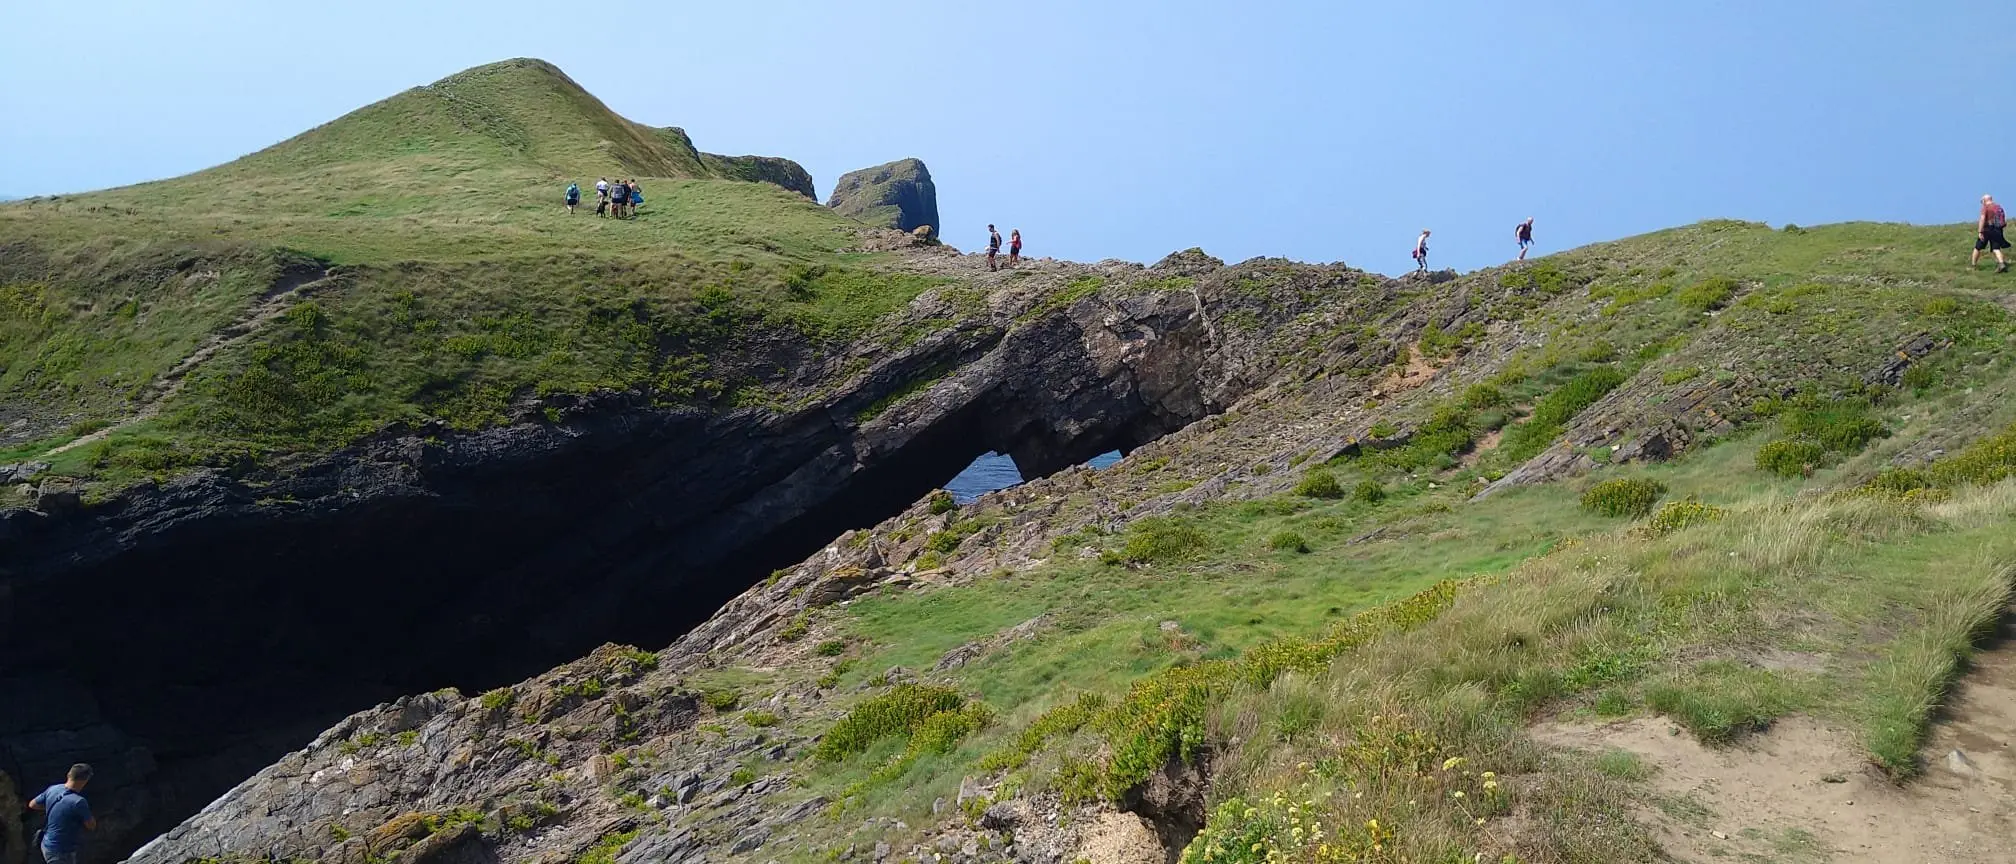
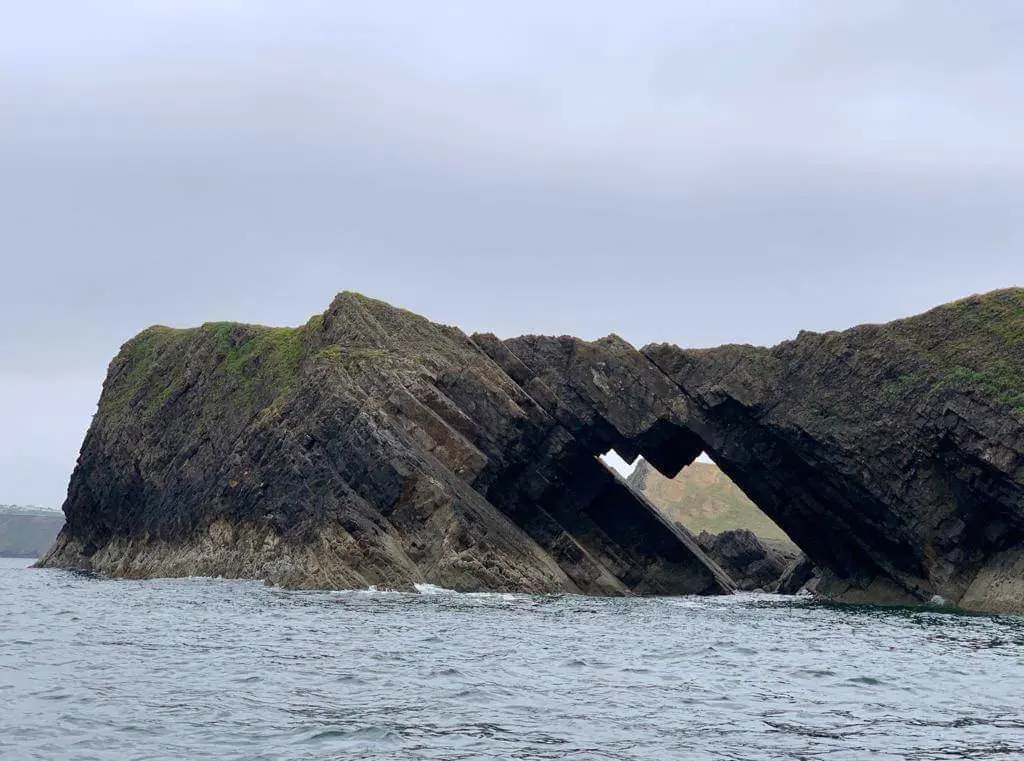
Past Low Neck, the path climbs onto Middle Head and threads by Devil’s Bridge, a dramatic natural limestone arch carved out by centuries of wave action. It's one of the most photographed spots on the whole walk, but stick strictly to the marked high line as you pass — the drop is precipitous on both sides, and the rock underfoot is no less jagged here than anywhere else on the route.
5
Outer Head & Bird Sanctuary
The highest, most exposed headland jutting into the Atlantic, with sweeping views back along the full length of the Worm and out across the Bristol Channel — and, in the right conditions, sea spray from the Blow Hole near the tip. Seasonal Bird Sanctuary Closure: The Outer Head is closed to all visitors from 1st March to 31st August each year to protect nesting guillemots, razorbills, and kittiwakes. REMEMBER: it can take 1–1.5 hours to get back to the mainland from here — factor this into your turnaround time.
⚠ Don't Take the Path on the Right of Inner Head
From the mainland, what looks like a third path along the right-hand side of the Inner Head is not a route — it's a steep sheep track. It's easy to lose your footing on, especially when wet, and it runs close enough to disturb the seals that haul out on the rocks below. Stick to one of the two proper paths (lower, to the left, or over the top) and give the seals plenty of space: if they lift their heads or move towards the water because of you, you're already too close.
⚠ Notice a Second Path on the Map?
OS maps of the headland show a second track running back from the Outer Head along the higher ground, avoiding the steep drop to Low Neck. Experienced Worm walkers sometimes use it as an easier way back — but it is not a route we recommend for visitors. It floods over before the causeway itself does, so it gives you less safe time than the causeway tables on this page suggest, and it can come in very quickly. Crossing early in the causeway’s opening window and not lingering on the Worm gives you more margin, but misjudging this route can cut you off earlier than you’d expect. Unless you know these tides with real confidence, retrace your steps back over Low Neck to the causeway — that’s the route these tide times are calculated for. If you’re ever unsure, call the Lookout Station on 07392 327216 or VHF Ch 65 before heading back.
The Rock Beneath Your Feet
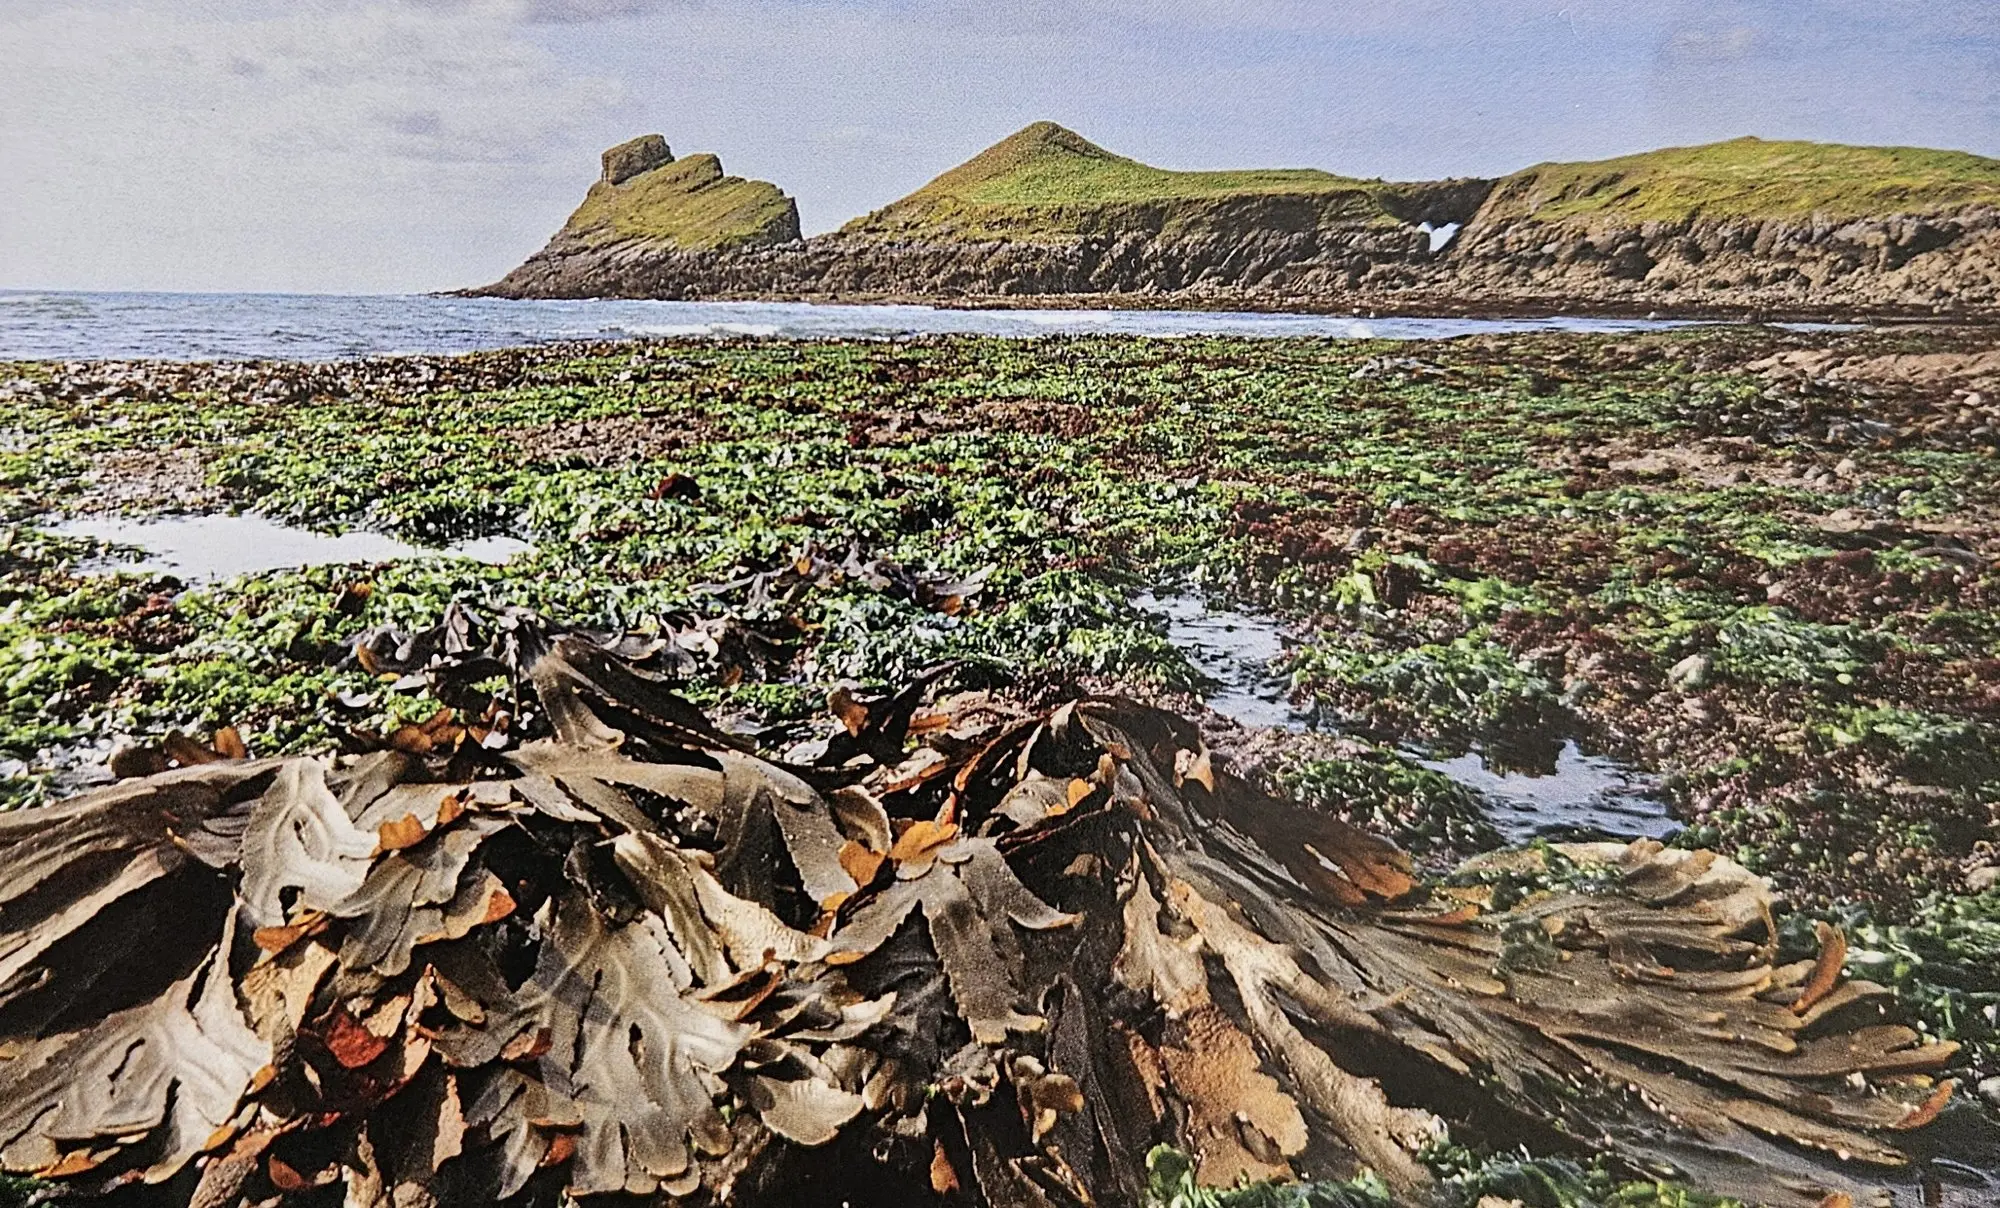
The reef you're crossing is Carboniferous limestone, laid down as seabed sediment over 300 million years ago and later tilted almost on end by earth movements — which is why the rock underfoot runs in sharp, upright ridges rather than lying flat. Millions of years of Atlantic wave erosion have since cut it into the fractured, jagged surface you're walking on.
That same erosion has carved sea caves, a blow hole, and natural arches into the headland, including the famous Devil's Bridge partway along the route. Read more about the Worm's rocks and wildlife →
The Samuel's Anchor
Photo courtesy of Martin Jones
Keep an eye out on the causeway for an old ship's anchor bedded among the rocks and mussels. It is thought to be from the Samuel, a Norwegian barque wrecked here in 1884 while carrying coal — and if you look closely, you may still spot small pieces of her coal in the rocks around it.
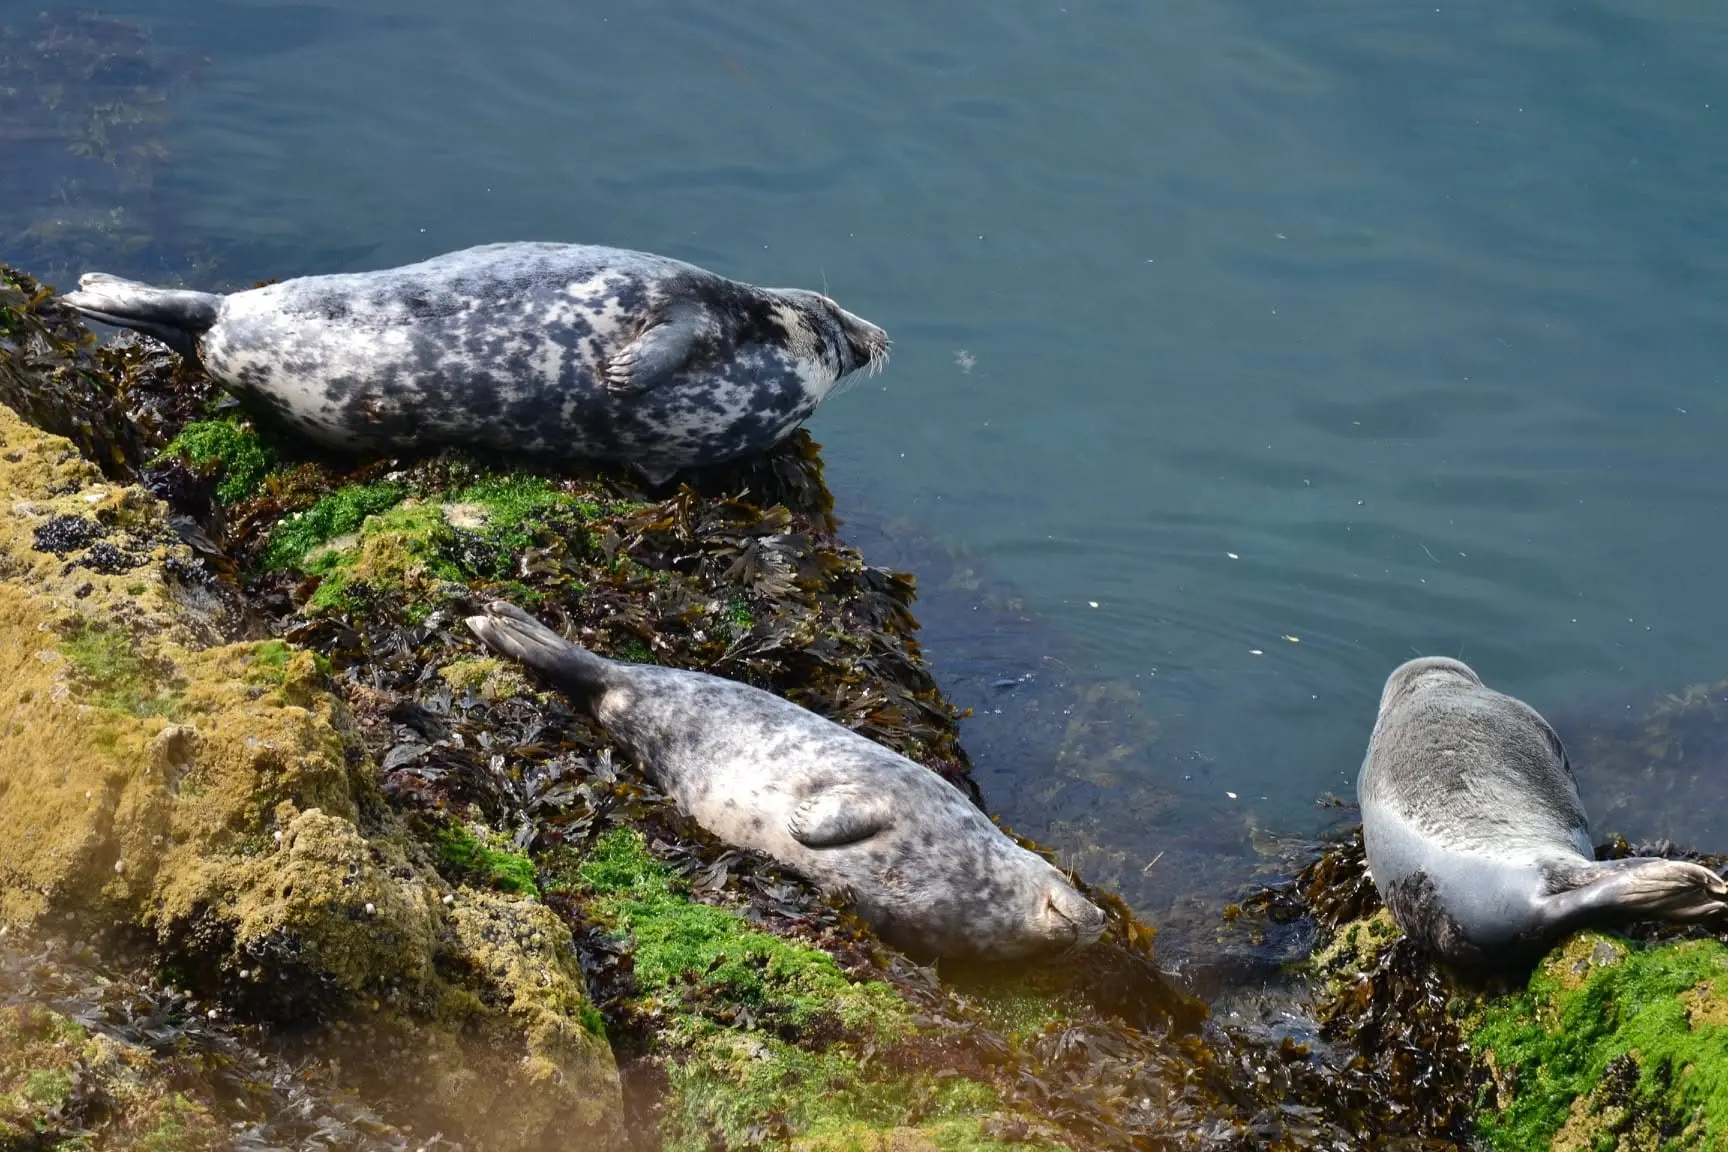
Photo courtesy of Gareth Richards, Gower Seal Group
Worms Head sits within the South Gower Coast SSSI, and it shows. Grey seals regularly haul out on the rocks around the causeway and Inner Head. Keep dogs on a lead at all times here, and give any seal plenty of space — if it lifts its head or moves towards the water because of you, you're already too close.
The cliffs of the Outer Head are also a seabird breeding site — guillemots, razorbills, and kittiwakes nest there each spring and summer, which is why that section closes to visitors from 1st March to 31st August. Watch for them wheeling around the headland from Inner Head or Middle Head instead.
This isn't a gentle coastal stroll. Every step across the causeway and along the Worm itself is over uneven, fractured rock, often slick with wet seaweed — there's no smooth path, and you'll need both hands free at points to steady yourself on the scramble sections.
Expect it to feel slower and more tiring than the distance suggests: the round trip from the causeway to the Outer Head and back is under 5km, but allow at least 3 hours of careful, non-stop scrambling — and leave extra time, as the causeway can close early, sometimes by an hour. If you're not confident on rough terrain, Inner Head and Middle Head still make a rewarding, shorter walk without the harder ground further out.
This isn't suitable for wheelchairs, mobility scooters, or pushchairs at any point — even sure-footed, able-bodied visitors need to take real care.
Waiting for the Causeway, or Already Closed?
There’s plenty more to explore nearby while you wait for the next window — from the highest point on Gower to secluded limestone coves.

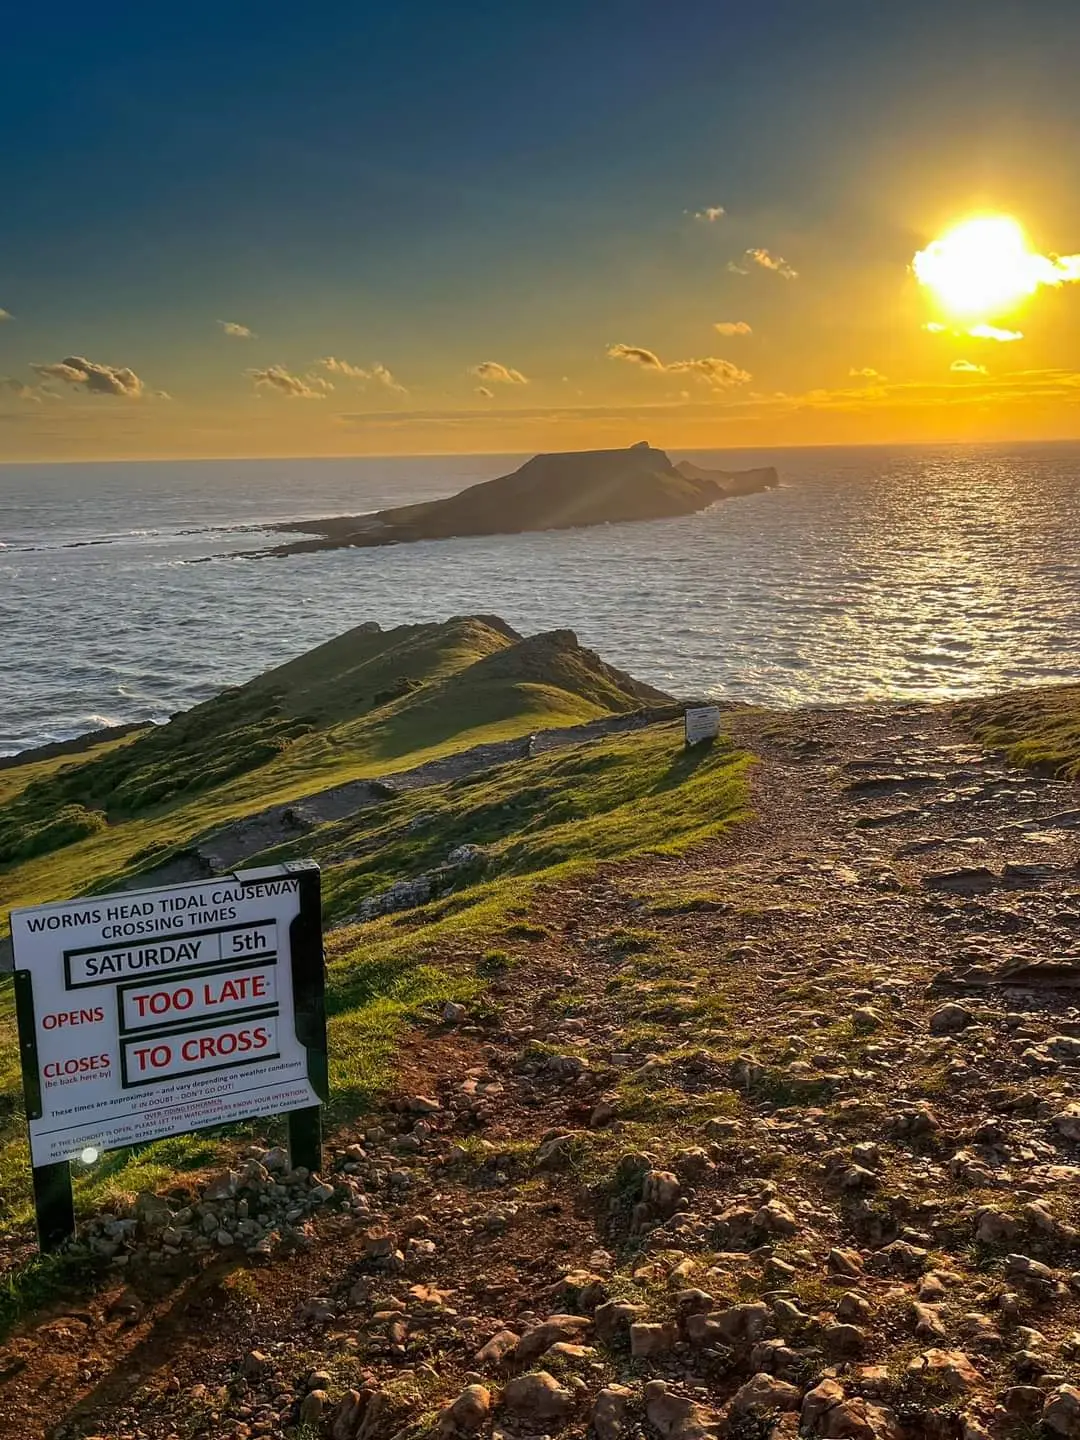 Photo courtesy of Zoe Evans